Sherwood Ranger - Make Parts - 10A
*This web site is NOT owned or managed by G-TLAC. G-TLAC is not responsible for the content unless explicitly stated. See Disclaimer.
Split from the prior make parts page to collect parts made from square tube...
9/20/11 - cut tube into U
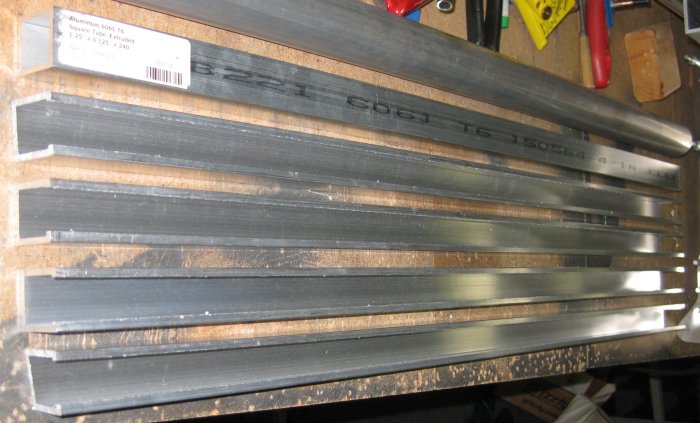
1/2 hr - cut the 4th side out of the 1.25 x 1.25 x .125 square tube to make U channel. Took the two 6-foot lengths and cut them to 3 feet with a hacksaw, so the pieces wouldn't be so large on the table saw. Extracted the table saw from under the junk at the front of the garage and set it up in the driveway. Set the saw to cut the square about 3/16" in from the side, so there is a little material left to remove. Took longer to clean up the mess than to make the cuts. Saved the 3-foot supplier-cut length as a square tube, as there is a little square tube part to be made, and the u-channel parts add up to about 11.5 feet. Will cut the 4th side out of the extra piece if needed. In pulling the table saw out, found that some insect killing chemical had leaked out of the bottle. Not sure what is in it, but it dissolved the gas and oil-proof garage floor epoxy coating. Took even longer to get that somewhat cleaned up.

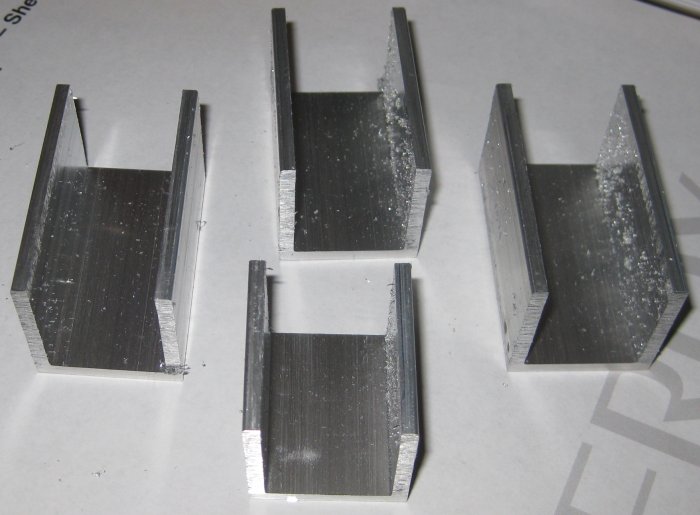
Not quite u-channel yet. The router will clean these up. Another messy process that I don't really like to use.
9/21/11 - U channel
1/2 hr - had the belt sander and bench grinder on the router table, so moved those and reset the router under the table. Shaved off the remaining flange from 2 of the 3-foot lengths, so about halfway done. Louder than I remembered. Not perfect surface finish either - not sure if the cutter has some wear on it, or if the surface finish was always this way. Anyhow, when these get cut down into smaller brackets, the portion with the routered finish will be quite small, and I can polish that up with Scotchbrite.
9/22/11 - U channel
1/2 hr - marked the two routered 3-foot segments for cutting into many smaller lengths and cut one of the 3-foot segments to part-lengths. Cut easier than I thought - just start the cut at the open end of the U, and down towards the flat across the bottom of the U. I thought I might have to rotate the extrusion in the saw, but it just cut through the 1.25 wide section at the bottom of the U - slowly, but it cut it no problems.

I didn't worry with getting completely to the end of the tube with the router - due to the router's direction of spin, it's easier to feed into the cut a little back from the end of the segment. No big deal - I laid these out so the little flange overhang would be cut off anyway.

9/23/11 - U channel
1/2 hr - ran the other two 3-foot segments through the router, since I had a few minutes when Carol took the kids to school that nobody else is in the house. The router is louder than I remember. Not all that loud just spinning free, but running material over it gets a lot louder.
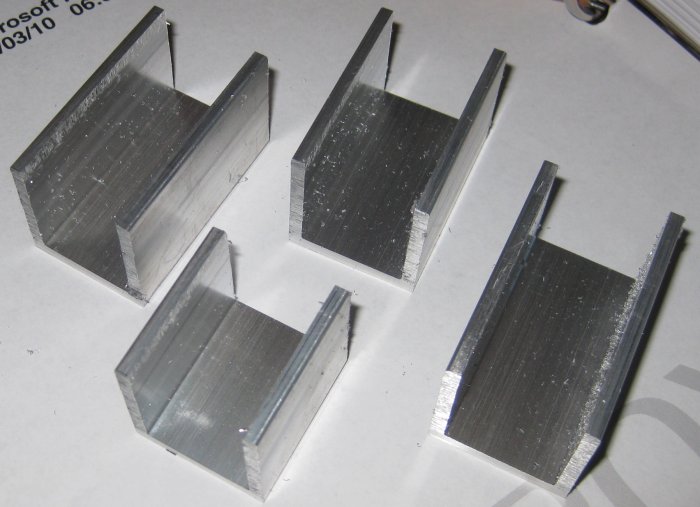
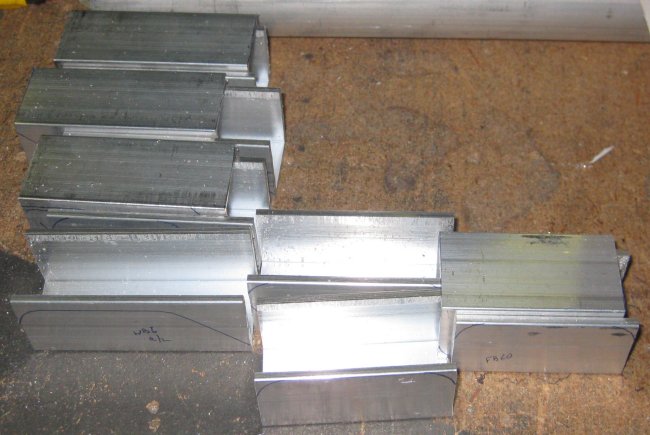
Rough-cut bracket blanks. No point cleaning this up until the additional needed cuts are laid out and made.
9/23/11 - U channel
1/2 hr - made cardboard patterns for the profiles of the parts. Some of the profiles repeat many times, with differences in the hole pattern in the bottom of the channel.
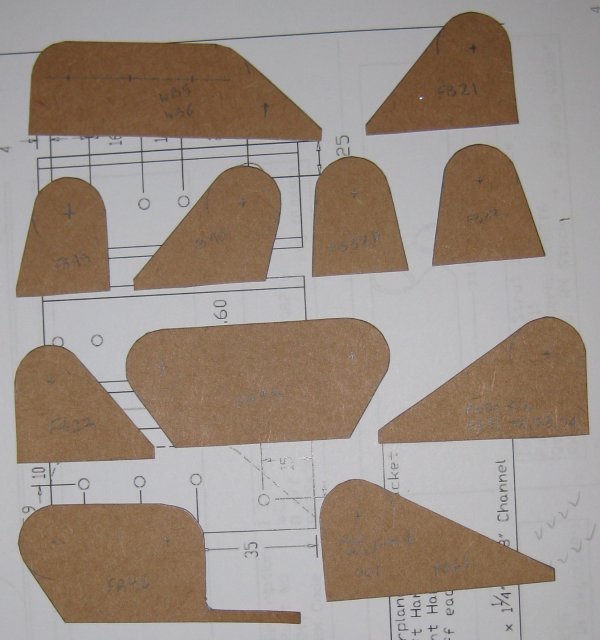
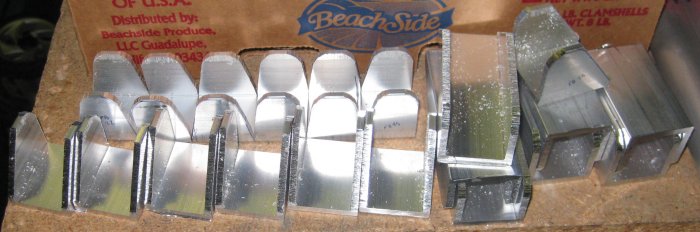
Cardboard patterns.
9/24/11 - U channel
1/4 hr - finished cutting the marked bracket blanks.
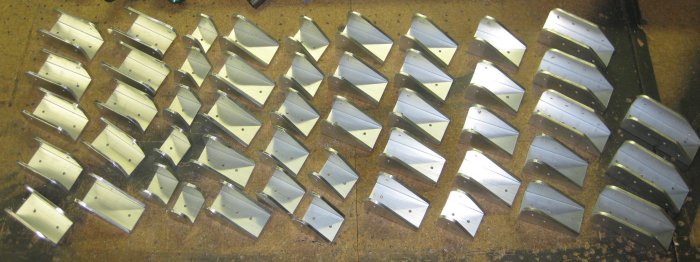
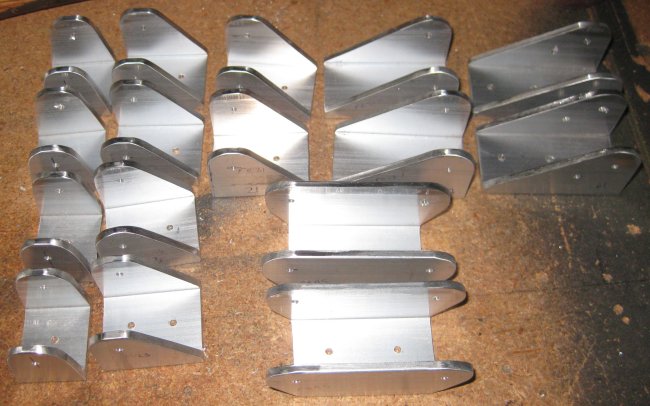
1/4 hr - marked the bracket blanks for final shape cutting. Tried one on the bandsaw - not too bad. Paper / cardboard patterns are the way to get this done - 11 patterns, maybe 60 parts. Much faster to just trace patterns than to re-measure on every part.
9/25/11 - Brackets
1/2 hr - ran ~15 brackets through the band saw to cut the blanks closer to final shape. Got a new belt for the belt sander at the hardware store, and sanded 5 or 6 of the cut-down blanks. Got 4 of these all the way through the scotchbrite wheel.
9/26/11 - Brackets
1 1/2 hr - ran a bunch of brackets through the band saw, more through the sand/scotchbrite. Counted 53 brackets in process. There are a couple more from this material that need 1/16" per side shaved off, and I think there's even a few that need that 1/16" per side from the inside of the U.
9/27/11 - Brackets
1/4 hr - mark brackets for drilling. 1/4 hr - center punch marked brackets for drilling.
9/28/11 - Brackets
3/4 hr - drill marked brackets, center punch some more marked brackets, run a few on the belt sander and scotchbrite wheel, mark these.
Another 3/4 hr - marked, punched, drilled, cut some more on the band saw...
11 left for the band saw.
20 ready for the belt sander / scotchbrite wheel.
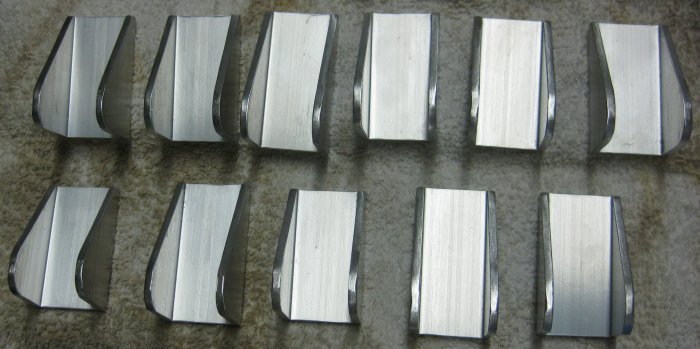
22 Shaped, smoothed, and pilot drilled, ready for assembly.
9/29/11 - Brackets
3/4 hr - sanded / scotchbrited 11 more brackets.
1 1/2 hr - marked for drilling, drilled, bandsawed, sanded, scotchbrited more brackets.
9/30/11 - Brackets
2 1/2 hr - sanded, scotchbrited, marked for drilling, drilled... All but 4 brackets drilled, and 2 of those still need sand / sb as well. So what's that - 49 done? Also brought in the 1.5 x 1.5 square tube to start measuring for the two cross beams behind the firewall. Note - I did NOT use the cardboard patterns for marking the hole locations. I measured from the actual part edges because that gives more accurate hole locations. Also, I did not drill through the U to the other side - I marked and drilled each side separately. The secret / trick to hitting the marks exactly with the drill is to center punch after marking with an ultra fine point Sharpie.
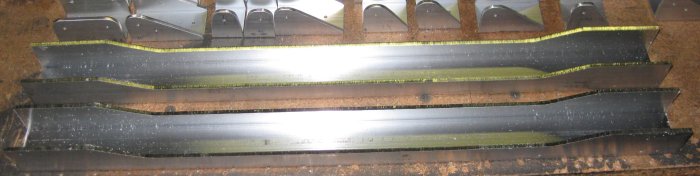
10/1/11 - Firewall beams
1 hr - marked, cut, sanded, scotchbrited the two firewall cross-beams. 1.5 square stock.
10/1/11 - Firewall beams
1/2 hr - marked for drilling, drilled. Cleaned off a sticker from the supplier (could have marked the part to cut that off, but I had already started marking with the sticker in the keeper side of the part...).
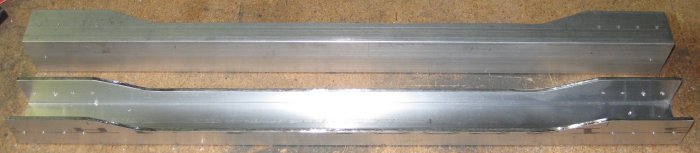
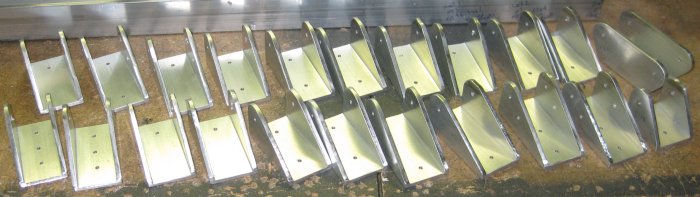
Firewall beams, after sanding, scotchbriting, marking, and drilling.
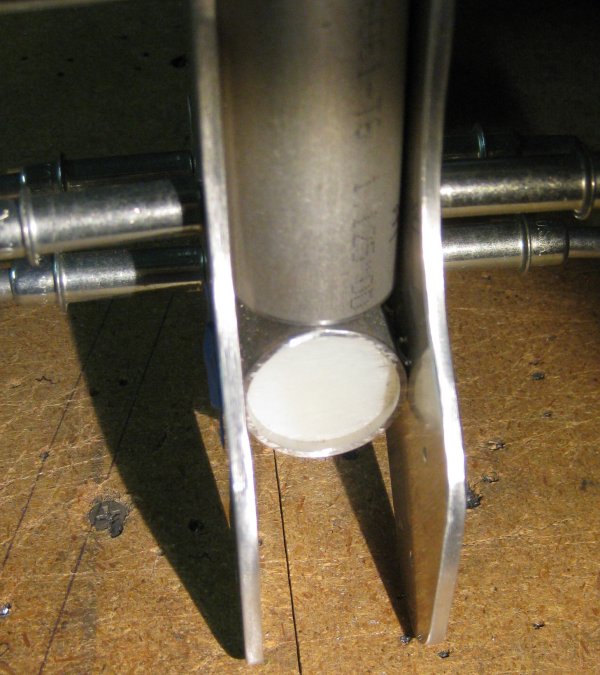
10/1/11 - Nylon tube inserts
3/4 hr - mark, drill, cut to length, debur, and test fit nylon tube inserts. I had originally counted 8 of these at 1" long each, but there are 10. I had bought 1 foot, so I made 11. Now that I see where these go, I will look some more to see if more are needed. Definitely drill before cutting, that way the long piece can be held in the vise on the drill press for good on-center through holes.
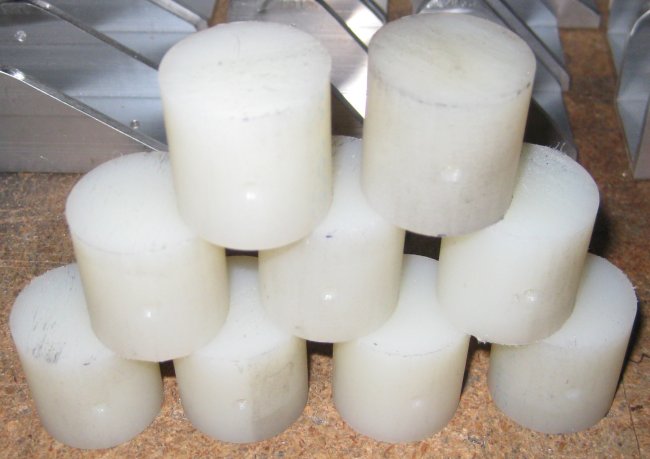
Nylon tube inserts.
Test fit - shined a light through the hole, and inserted a cleco from either side.
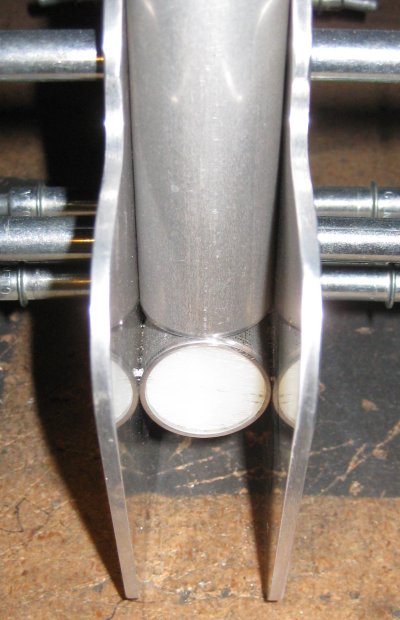
Test fit - another insert, another location.
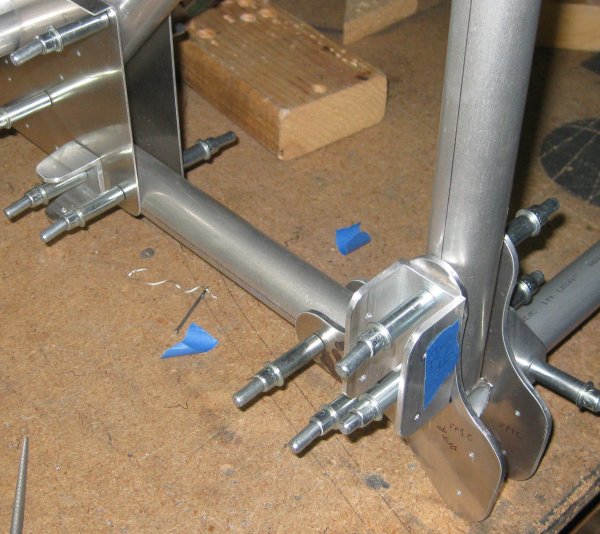
10/1/11 - Brackets to fuselage frames
1 1/4 hr - located all of the brackets on the two main frames that I have standing up on the work bench. A LOT of these brackets go on this central structure. After getting them clecoed on, I rearranged the clecoes to allow for 4 more tubes to be clecoed onto the structure. Found one tube the registration of the holes from end to end was a little twisted.
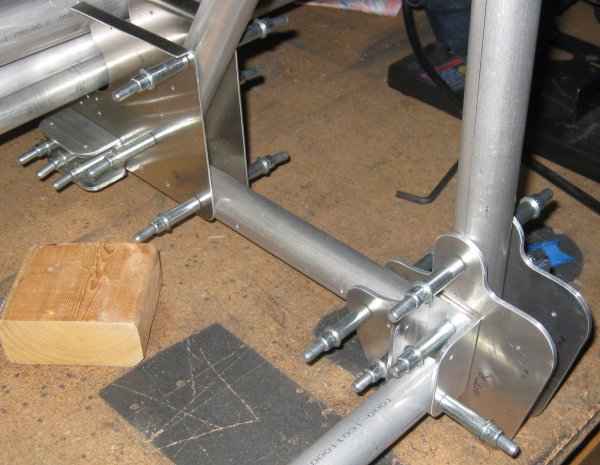
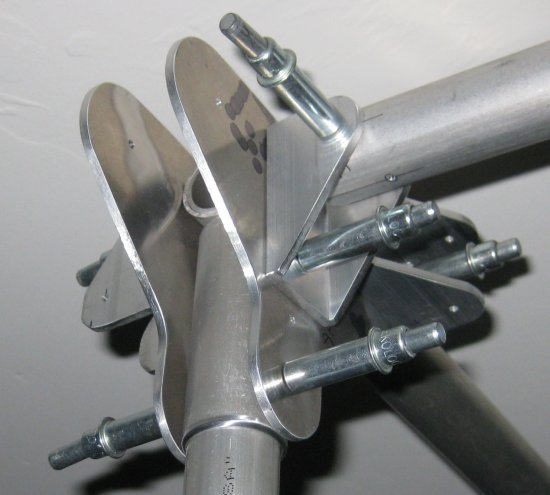
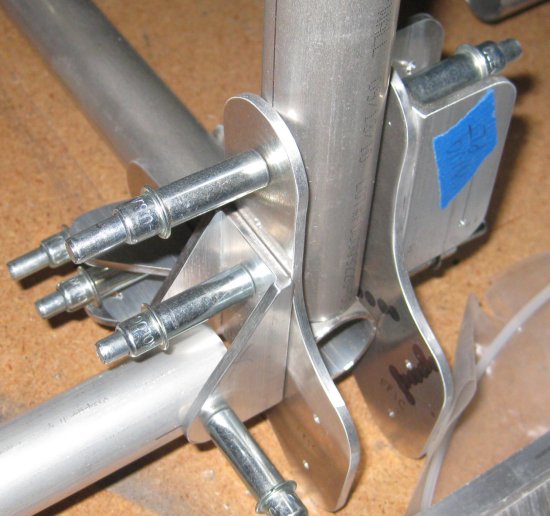
After setting aside 8 wing brackets, and not counting 2 brackets that I haven't finished sanding yet, that's all that is left - the other 27 went on the central frame structure.
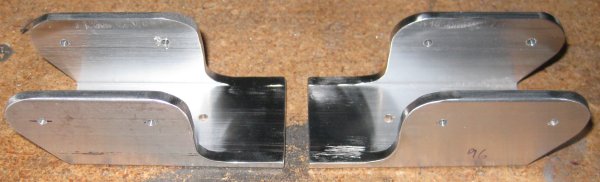
10/2/11 - U-channel brackets
1/2 hr - Worked on the final 2 u-channel brackets. These have a shape that I needed to get out the Dremel tool to work on - with a tiny sanding drum.
10/3/11 - U-channel brackets
1/2 hr - Finished off these brackets with some final shaping, then the scotchbrite wheel. Marked for drilling and drilled.
Click to join sherwoodbuilders