Sonex* Engine
*This web site is NOT owned or managed by Sonex, Ltd.. Sonex, Ltd. is not responsible for the content unless explicitly stated. See Disclaimer.
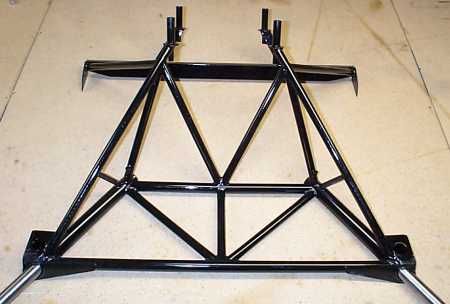
"Hotrod" engine mount has arrived. 1/21/00
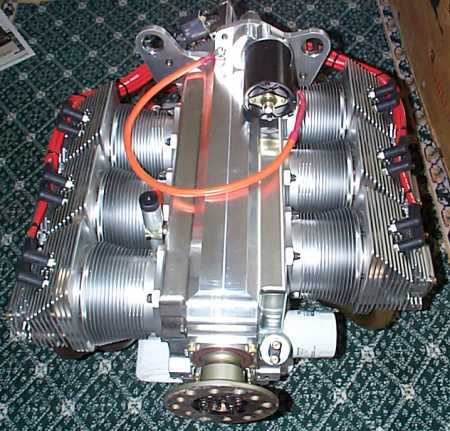
Engine arrives. 2/22/00
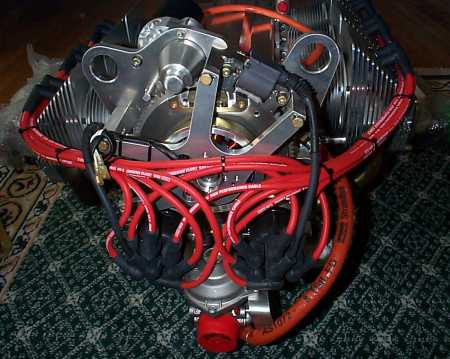
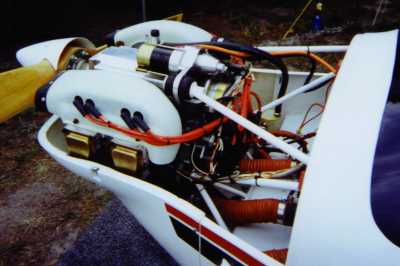
Back of engine showing starter, ring gear with integral coil energizers, alternator at center, dual ignition, and carb at bottom. 2/22/00
Engine left side. 2/22/00

Engine identification plate. 2/22/00
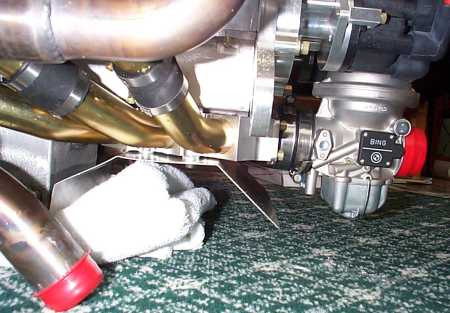
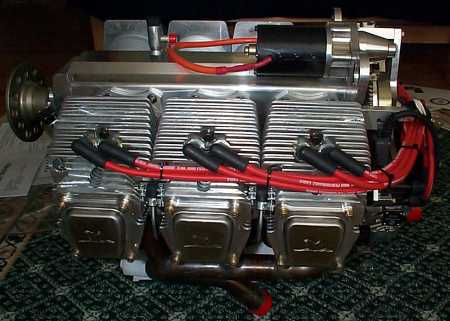
Left side, below cylinders. Shows muffler heat shield (sheetmetal) with intake plenum (gold colored tubes) attached to oil sump. Distributor cap at upper right. Engine is fixed-timing, so "distributors" are just rotors with caps.
When engine arrived, delivery person and myself carried the crate from the truck to the garage. Shipping weight was listed as 190#. I will not try to install it without a hoist, but it was not difficult to carry. Removing it from the crate, I lifted by the prop flange and a friend lifted at the upper aft mounts. Though the crate did not weigh much, the engine seemed a lot lighter outside of the crate.
Engine package includes 3 "books" of documentation - a maintenance manual detailing complete disassembly / rebuild and all parts, an installation manual detailing wiring and other connections, and an operations manual including specifications, operating limitations, required fluids, maintenance intervals and items to be performed at the maintenance intervals. Engine is run-in at the factory.
Also included in the engine package are a muffler, cooling shrouds, assorted fasteners for the cooling shrouds, engine mount grommets, a relay, solenoid, and voltage regulator with wiring harness. There are several pieces of sheetmetal to be fabricated (patterns included) to go inside the cooling shrouds. These are air-directing baffles that do not appear too complicated. I will try making these from .032 aluminum. 2/22/00
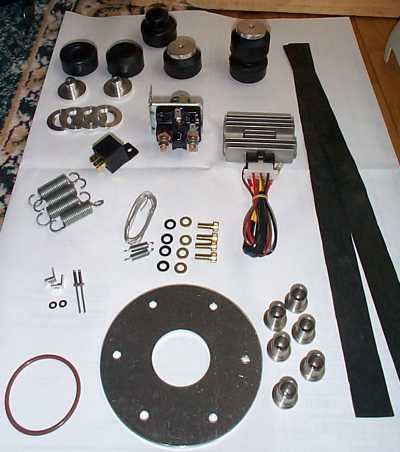
Items that come with the engine: CCW from upper left - rubber mount grommets & metal inserts. (2 mount-side grommets shown below on engine mount) 4 mount shims? (for aligning engine on mount?) Solenoid relays. (I think there are two - the small black one for a start button leading to a the higher-powered one in the center to the starter, but I'm not sure.) 4 springs to attach muffler to exhaust headers. Wire & small springs to secure between-cylinder baffles. 4 socket-head cap screws, 4 washers, 4 bellville (spring) washers. I don't know what these are for. 2 blind rivets, 2 L-brackets, 2 small washers - for securing air scoops over cylinders. O-ring (for ?) Prop crush plate? 6 engine-mount inserts (for firewall-side of Jabiru proprietary engine mount?) Rubber strips for forward edge of air scoops. Voltage regulator with wiring harness (including rectifier?) 2/27/00
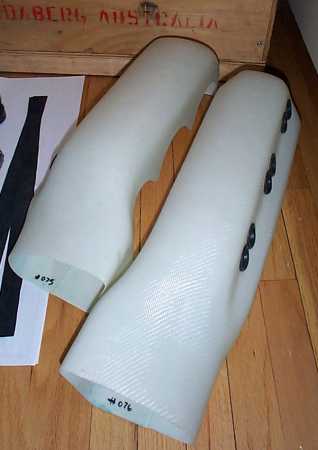
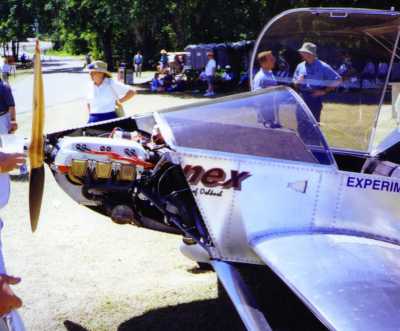
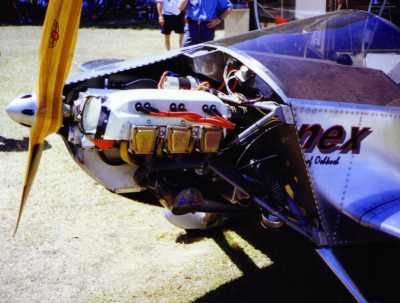
Cylinder air scoops. The left-side scoop (on right in photo) is longer because the left-side cylinders are aft of the right side cylinders. Looking at the Sonex installation, most of the scoop forward of the cylinders is cut away - the forward cylinder is very close to the front of the cowling. The air scoops eliminate the need to construct a plenum / baffles under the cowling. 2/27/00
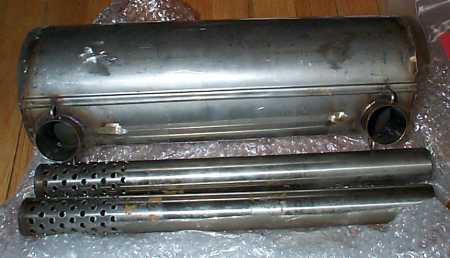
Muffler & pipes. Muffler fits directly to headers on engine. There are no exit holes in muffler. This would allow builder to select exhaust pipe location, but requires cutting holes in muffler and adding pipes. 2/27/00
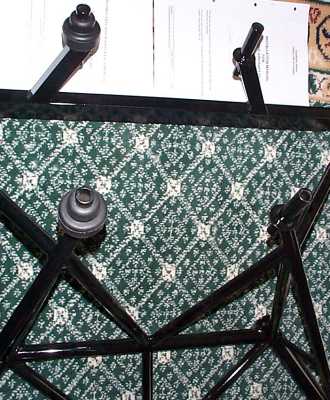
Installing mount-side grommets onto engine mount. I used soapy water inside the grommet and a pipe wrench to twist them on. The Jabiru documents show the grommets installing on an 18mm dia. engine mount (.708" dia.). The Sonex mount uses .750 dia. tube, plus paint/coating thickness. So the grommets are very tight. 2/27/00
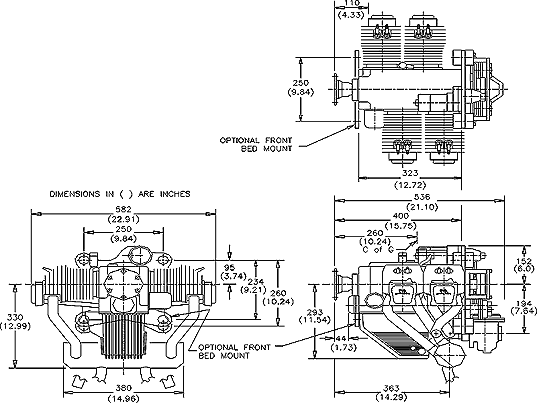
Drawing of 4 cylinder Jabiru engine from Jabiru site.
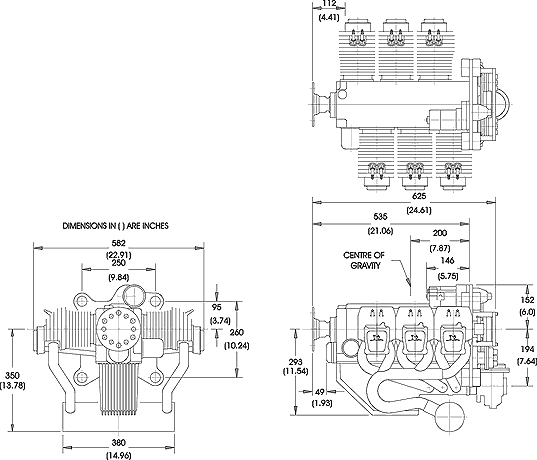
Drawing of 6 cylinder Jabiru engine from Jabiru site.
4 cylinder engine installed in Jabiru airplane, Sun N Fun 1998.
Another view of 4 cylinder in Jabiru airplane.
This airplane was very tight inside.
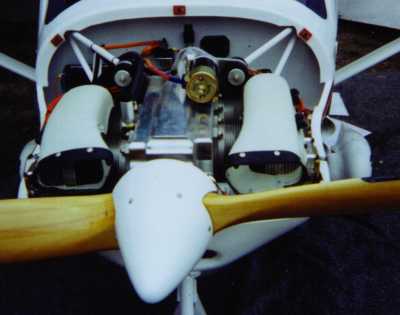
Jabiru 6 cylinder in Sonex, Sun N Fun 1999.
Another view of 6 cylinder.
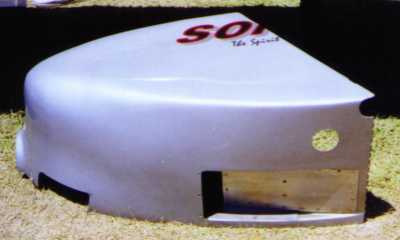
Cowling half showing sheet metal detail.