Sonex* Forward Fuselage 4
*This web site is NOT owned or managed by Sonex, Ltd.. Sonex, Ltd. is not responsible for the content unless explicitly stated. See Disclaimer.
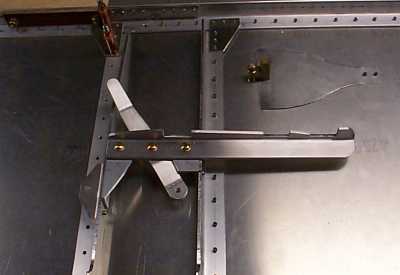
Detail of flap quadrant and trim handle. 11/28/99.
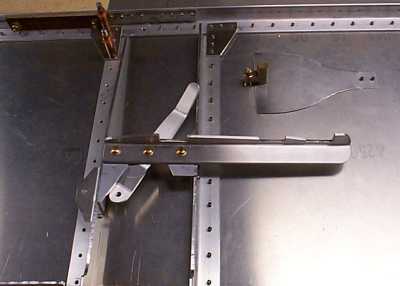
Flap bracket supports act as stops for trim. 11/28/99
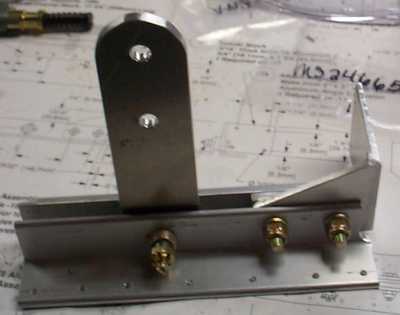
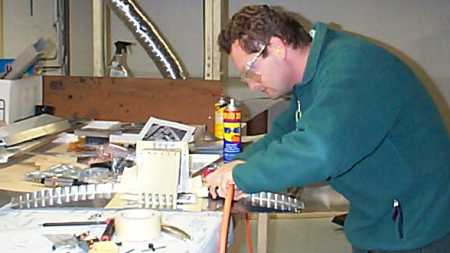
Idler and idler support brackets. This took quite a few hours' work to get the bushings to fit and to get all of the holes drilled exactly in line. Used unibit for the larger bushing holes (works well). Bought a vise for use on the drill press ($13) to get better perpendicularity on the holes. 11/29/99
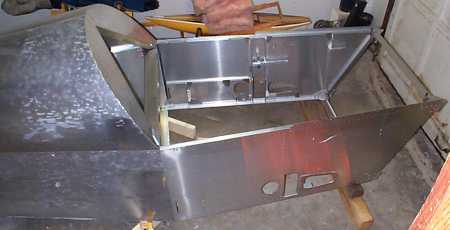
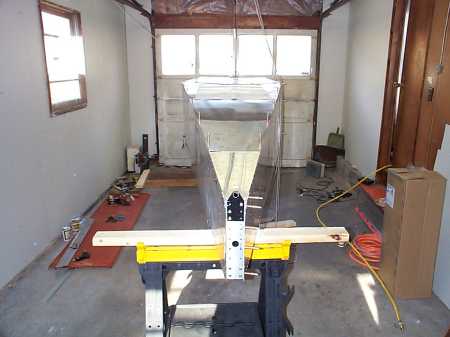
Starting work joining cockpit sides to tail cone. 11/29/99
First fit check. Need a little shaping on the bottom edges of the forward t-deck formers, otherwise looks ok. When doing the forward formers, the cockpit side upper angles go under these to meet the upper longerons. I did not have the assembly drawing when I did the tail cone, so I let the formers cover the front end of the upper longerons. 11/29/99
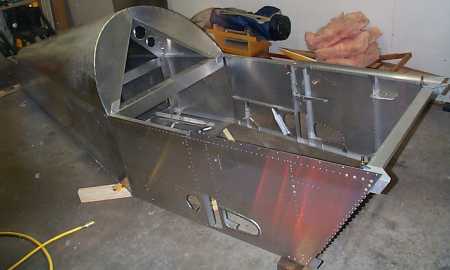
This is mostly to show the garage to the folks back home. Thanks to Dave, for throwing the insulation out of his house & dropping it off at my place before taking it to the dump & also for helping me cover the "new" insulation in the garage with drywall. With the garage at about 40F, some of you might recognize the therm-a-rest that I use to keep from freezing when sitting on the floor. 11/30/99
I kind of doubt that this is the last inversion I am going to have to make of the full fuselage. But it seemed to be a reasonable way to put the floor into place. It is a little high for drilling from the pilot holes in the floor down into the cockpit sides, but I sat on the forward sawhorse to drill the aft floor & aft cockpit sides out from the inside. 12/1/99
Once again, most of the cleco collection goes for an airplane ride. At this point, I'm upping the cleco count from the initial 120 per size to 220 per. So all of these will stay aboard, and I will have more to work the firewall & floor beams. 12/1/99
Trying to show that I covered the firewall & drill chuck with masking tape to prevent marking the firewall when drilling for the fuel filler box. 12/4/99
Firewall going in. Required very slight trimming at corners near engine mounts & a slight rebending at the upper cross beam (covered by upper firewall in this shot - there is a row of rivets across the top of the large lower firewall panel which connect it to the cross beam). 12/4/99