Sonex* Forward Fuselage 5
*This web site is NOT owned or managed by Sonex, Ltd.. Sonex, Ltd. is not responsible for the content unless explicitly stated. See Disclaimer.
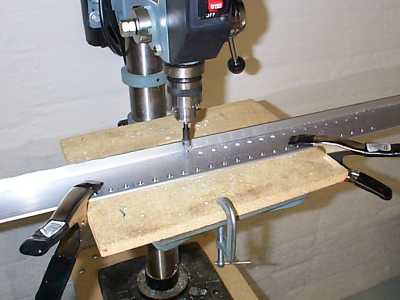
These c-sinks were too close to the angle for the microstop, so I did them in the drill press. This is much more difficult to set up than the microstop, and is not as consistent. Avery makes a reduced-clearance microstop for $26, which may be a better way to do this. 12/12/99.
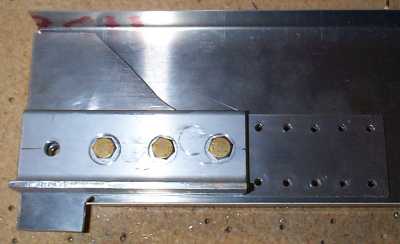
Rear spar pass-through structure. 12/12/99
I don't exactly understand this yet, but the -10 bolts called out on the print were too long. These are -7 bolts. 12/12/99
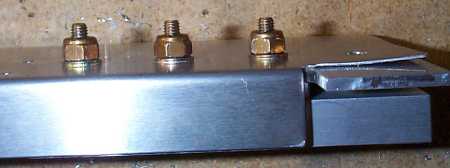
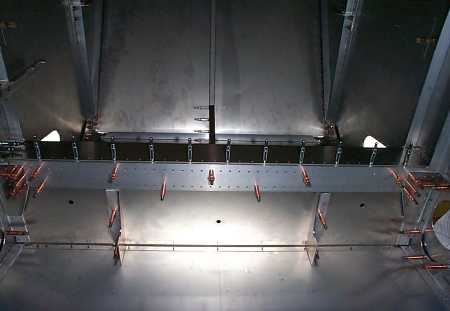
Main spar box, forward looking aft. This and the next pictures are rotated to aircraft-upright. Actually, the fuselage is still upside-down. The 3 holes in the box are for access to the wing-dihedral pins/bolts. As such, it was suggested to me that they be made larger than the 3/8" dia. shown to allow for easier wrench access to the wing pins inside. 12/12/99
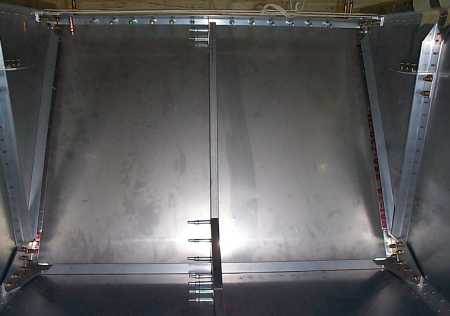
Main spar box, aft looking forward. Again, the 3 holes in the box are for bolt access. I may enlarge these. 12/12/99
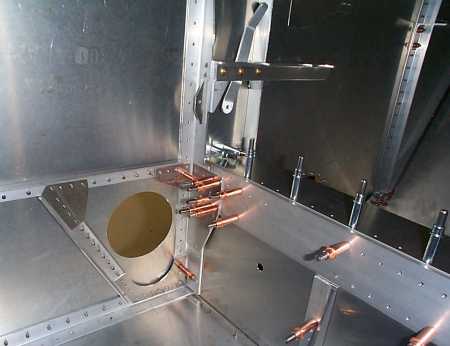
Inside of firewall. String along top was to maintain fuselage width dimension while drilling the upper cross beam. At upper right & left are rudder pedal brackets. 12/12/99

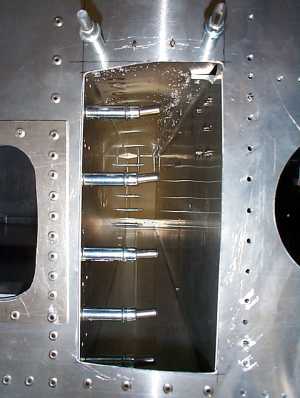
Main spar box, right side, aft looking forward. Paper over aileron pushrod hole was because the sun was behind the hole, reflecting off the aft side of the box into my eyes as I lined up everything. 12/12/99
Main spar box, left side, aft looking forward. Trim & flap control components on left side. 12/12/99
Left side view through main spar box. Note chips on top of box. Airplane is upside down, view is rotated. 12/12/99
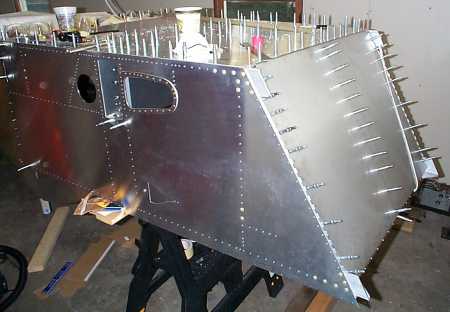
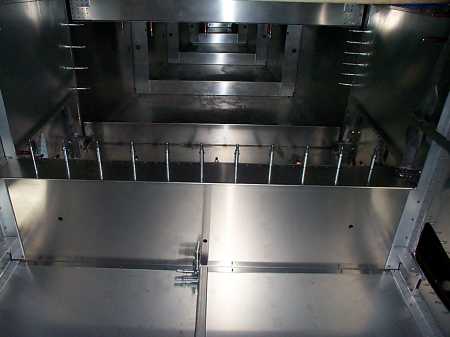
This is how I am working the fuselage assembly. A lot more clecoes on board this week, otherwise it looks about the same as last week. To do the firewall support beam, I drew a centerline on it, used masking tape to hold it to the firewall after alignment, then held it from the bottom (as shown, not the "bottom" of the airplane) to do the first hole. Then, for each consecutive hole, I held it by the next cleco down. For the floor support beam, I again used masking tape to hold it along the centerline, and held it by hand through the flap pushrod hole for drilling. I used a stub drill to prevent marking up the opposite inside of the square tube supports. (Stub drill bottoms out on the skin before it hits the back side of the square tube.) How to debur the inside of the square tube? I have the one-sided debur (~$58 from ATS, p/n TD002), but I haven't tried it yet. This tool has been recommended for doing wing ribs, but it is ideal for the square tube where there is no chance of back side access for deburring. 12/12/99