$8.84 Twilites:
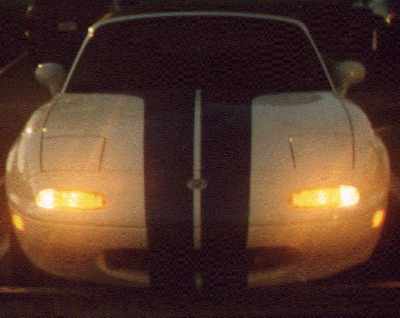
How I did my own twilites, w/o kit.
Parts: 2 'sidemarker sockets' 'Chrysler' by Motormite p/n 85864. These feature a socket for your leftover #194 bulbs from the side marker change (Miata Electrical Trick #101, change your side marker bulbs from #194’s to #168’s - the #168’s are brighter). And they feature dual retaining rings. $3.17 ea. from Pep Boys. They also had a few other sockets for the #194 bulbs, but these required twist-in sockets or only had single retaining rings.
Other parts: 2 #194 bulbs. Had these. Smash-on 'Quick Splice'. You know, the blue plastic things with the metal fork shape that you smash onto a wire to take a tap off it. $1.99 from a different parts store (Pep Boys - everything but quick taps!) Parts total with tax, $8.84.
Tools: Ryobi moto-tool. 3/32" drill bit, small sanding drum (came with moto-tool), X-acto style knife.
Procedure: remove the front signal housings from the car. 2 Phillips screws per side, and twist socket to remove.
Make holes for the new sockets. I did the right housing first, rather than doing the first housing right. I (after trying a few other tools) used the 3/32" drill to drill a series of holes around the edge of the molded-in socket shape. Be real careful not to drill all the way out the front of the housing! This is where a hand-controlled moto-tool is a real plus over a full size drill. I then used the drill bit to push through between these perforations. (Drilling sideways. I know it’s wrong, but a 3/32 drill is pretty beefy in plastic.) Before doing the last perforation, I pried the hole center out with the moto-tool wrench. I then used the knife to clean up the hole. I found the hole was too big. So I used RTV Silicone to glue the socket into the hole.
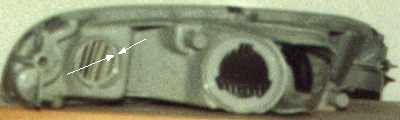
How to make the hole the right size:
What you’ve got there is a raised circle, and a rim around the circle, with a small space between the raised circle and the rim. You WANT to KEEP this small space, and only remove the raised circle. So on the 2nd housing, I drilled the perforations all INSIDE the raised circle. I then used the sanding drum on the moto tool to gradually remove what remained of the raised circle. What I then had was a hole with a rim and LIP. (This all should be pretty obvious when you look at the T/S housing...)
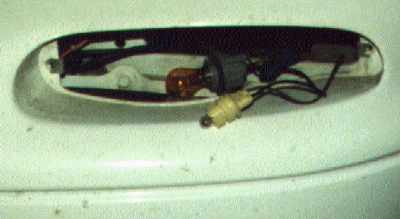
The Chrysler-style socket just pushed right in (kinda loosely), but it was not easy to pull out. We had a winner. I then stuck my finger in the hole and got most of the plastic dust off the lens and reflector, then I rinsed out the housing. The way this works best, I found, is to just flood the housing so the plastic floats out of the hole. I tried filling it partway, swishing it around & pouring it out, but the plastic dust just stayed on the inside of the housing. The next day I pulled the housing off the car & carefully dried out the inside of the housing with paper towels twisted in through the light socket holes.
Connecting the twilites to the car’s electrical system: I hung the housings off the front of the car by putting the stock bulbs back in. I already had the twilite sockets in the housings.
I then cut some length off the wires, and tapped black-to-black off the stock turn signal socket. The other wire you want to tap to the RED wire, not the green one (or you’re just adding turn signals, and not twilites).
Test, reinstall housings (4 screws). That’s it. Total time (not counting trip to the auto parts stores) about 30 min.
If you don’t have a moto-tool, I guess you could use a drill, knife & sandpaper, but it might be kinda messy. These housings cost over $100 each (and are NEVER at Mazmart used), so you don’t want to mess one up.