1951 Buick Special Deluxe - 10
12/28/13 - paint hood emblem
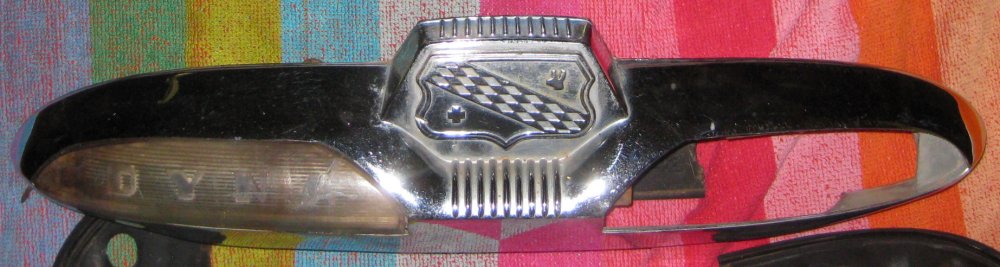
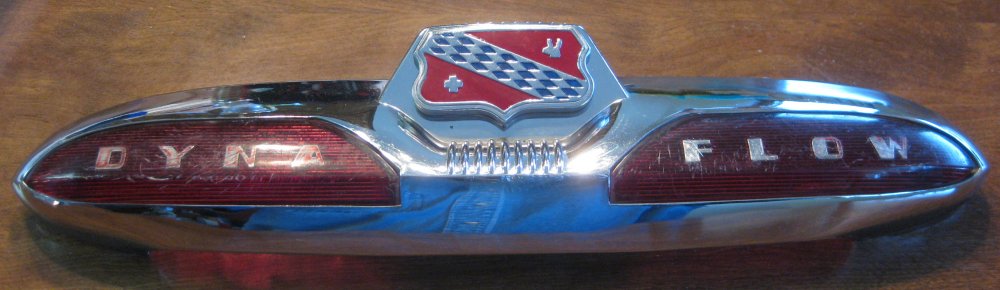
I have seen these advertised as new reproduction for $94 each. So I figured, for $0 additional cost (I already have the paints), I'd try adding some color back to the hood emblem.
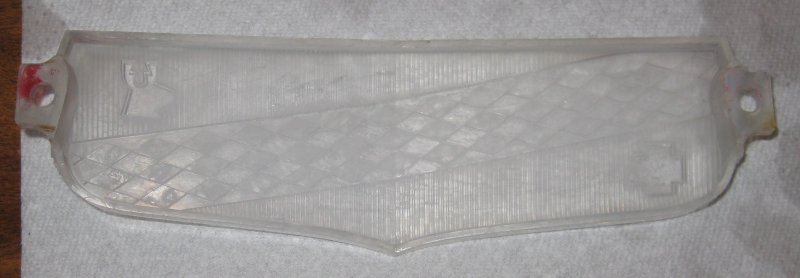
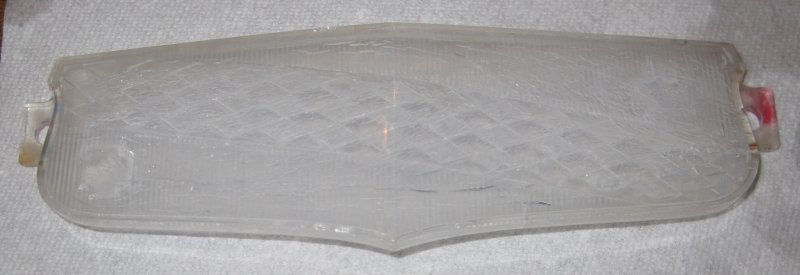
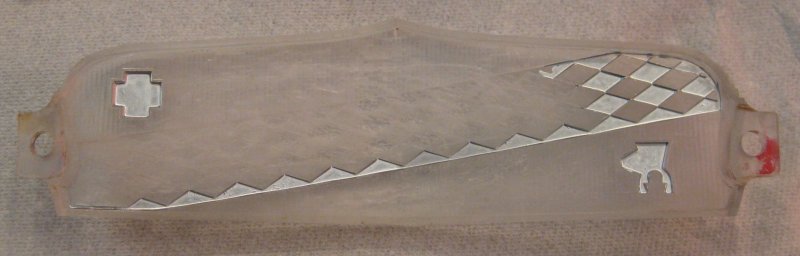
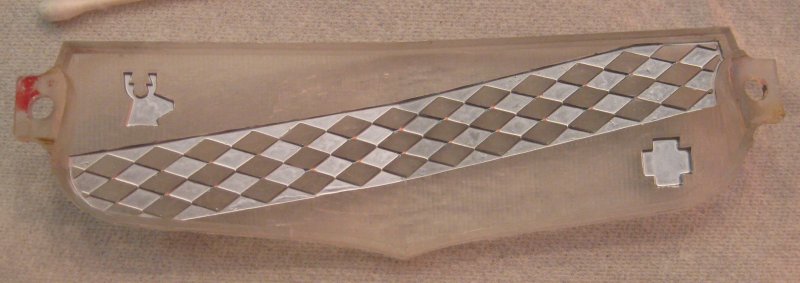
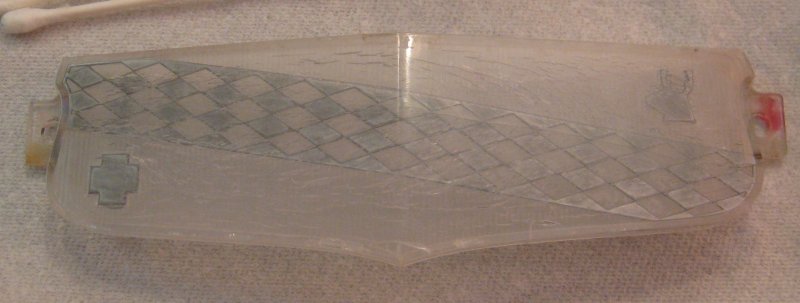
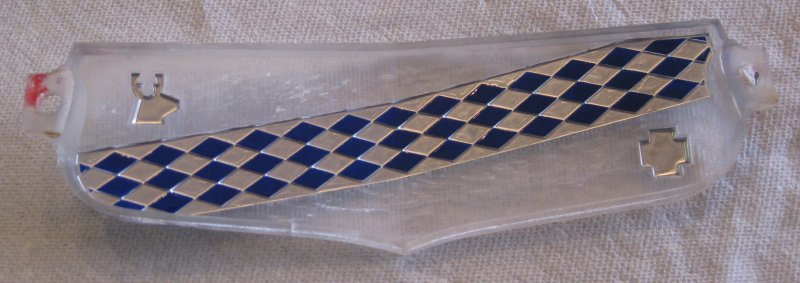
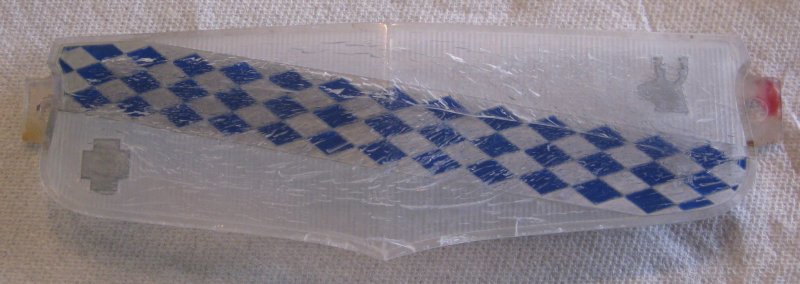
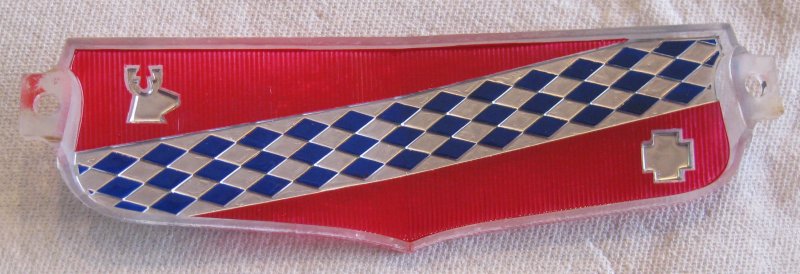
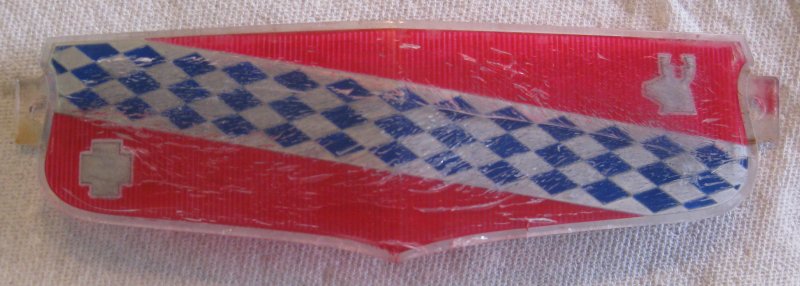
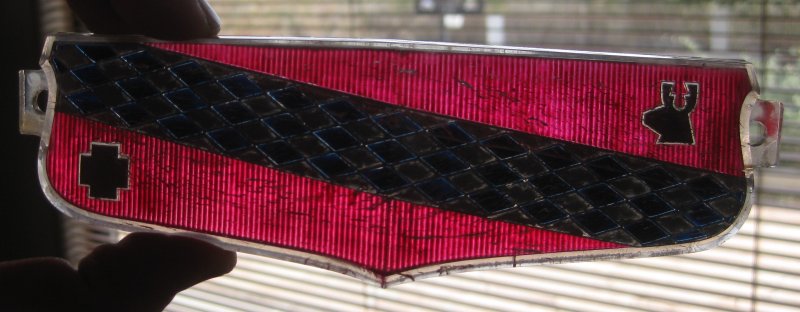

Though it may appear I have the steadiest hands in the universe, this is actually made fairly easy because the shapes in the emblem are at different levels. Silver goes on first - it's in the deepest "wells" in the part. I put blue on next, though it really doesn't matter. Just balance the blue on the diamond shapes and work the surface tension to get it right out to the edges of the diamonds. The red is pretty easy to fill in. Unlike the trunk emblems, I used the Testor's Dark Red here - it's pretty translucent in a single coat, so I left it at that.
12/29/13 - pull brake cylinders
Pulled the right rear brake cylinder. Then realized, I should probably have a photo of a brake before disassembly. So I took a photo of the left brake.
12/30/13 - more brake work
Pulled the left rear and left front brake cylinders. Front brake - much less in there without the parking brake. I did buy the drum brake tool kit from Harbor Freight. Got much use from the shoe retention pad tool and the spring release/install tool. There is a selection of adjuster tools and bleeder wrenches - will be using those later. Ordered the brake cylinders & hoses from the local NAPA store. With a quart of fluid & brake cleaner, the 4 cylinders + 1 of the 3 hoses was only $108. The other 2 hoses (the more expensive fronts) had to be ordered in from another distribution center, so those will take a few days & cost maybe $50-60. Got the 3 new cylinders installed, though the rear brakes were tougher to get back together. I guess the parking brake lever (which has a spring on the forward end) was fighting me pushing the shoes back against the upper pivot pin to get the top springs put back on. I watched a 1/2 hour Youtube video on replacing drum brake shoes. The key thing that I got from that is push the rear shoe up tight to the top pivot pin, put its spring on, then push the front shoe back against the pin and put that spring on. I had been trying to squeeze both shoes back at the same time. (In doing this, you are also pushing against a spring inside the cylinder.) Why only 3 of 4 cylinders? I only have 3 usable jack stands. Will put the wheels back on, set it down, and move the stands around to get the right front wheel.
12/31/13 - 4th wheel cylinder
Replaced the right front brake wheel cylinder. Now, just need the hoses. This one had quite a few wasp nests between the wheel and the brake drum. Might have never even taken this wheel off since its "big sleep". Front tires are both 225/70/15. Right rear is 235/75/15. Left rear (what was found as the spare in the trunk) is a 7.60-15. I've looked up some tire size conversions, and 225/75/15 seems to be pretty common, but since these are 5-inch rims, one of the tire dealer websites says to use 215/75/15. I think the narrower tire is closer to right - that 7.60-15 is narrow!
1/1/14 - brake hose
Worked on the 1 of 3 hoses that the auto parts store had for me yesterday. This is the one between the frame and the rear suspension. This goes into a splitter block with a hard line down each diagonal tube to each rear wheel. Both ends of this hose - the fittings are frozen solid. On the verge of rounding off the fittings, so I quit working on this. Will pressurize the system with this hose in place and get the car to where it can be driven to a brake shop.
1/4/14 - brake hoses
Yesterday, stopped by the NAPA to pick up the front 2 brake hoses. Also thought to ask about the U clips that hold them to the frame. Need 3, 1 for each hose. They had 1, so I paid for 3, to pick up later today (transfer from Phoenix). I also realized the front wheel cylinders came with the copper crush washer. I will need another crush washer for the rear hose where it goes into the splitter block on the rear Y-tube assembly. So will ask about that when I pick up the U-clips.
Also got the main output line from the master re-connected to the line. Had to take the master completely loose from the frame to line it up with the line. Seems the bends in these lines are/were approximate. Get the line tight to the master, then re-tighten the master to the frame. NO WAY to just tighten the line down to the master with the master tight on the frame - this would just strip something.
So, to do this job, so far, I have needed: 4 wheel cylinders (2 with crush washers included), 3 hoses, 3 hose-to-frame clips, a new master, and 1 additional crush washer. The brake pads and drums actually looked pretty good. No gouges in the drums and the pads have plenty of thickness. There was fluid at the wheel cylinders on the right side, so hopefully that means the system will bleed out ok. So it looked like, over time, the master seals had let go, as well as the seals on the left side wheel cylinders. So it's probably just as well that I went with the replace-it route rather than the rebuild-kit route.
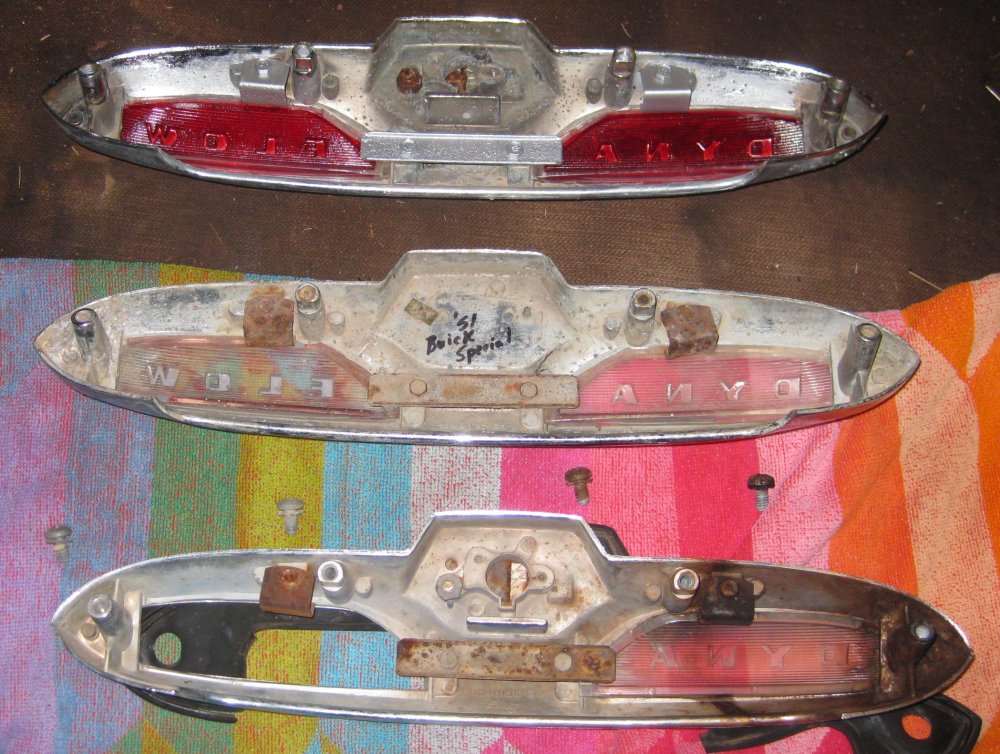
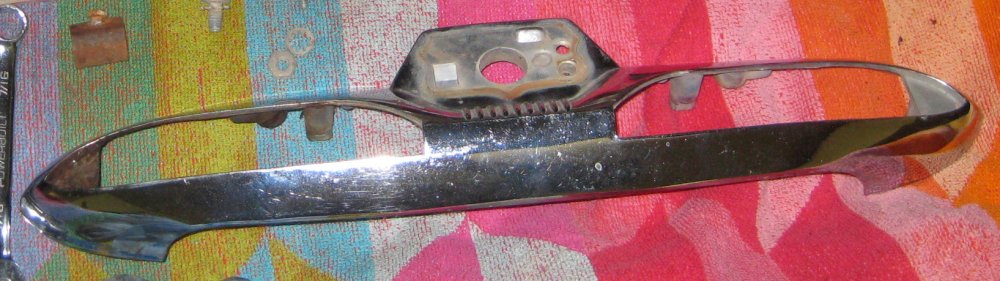
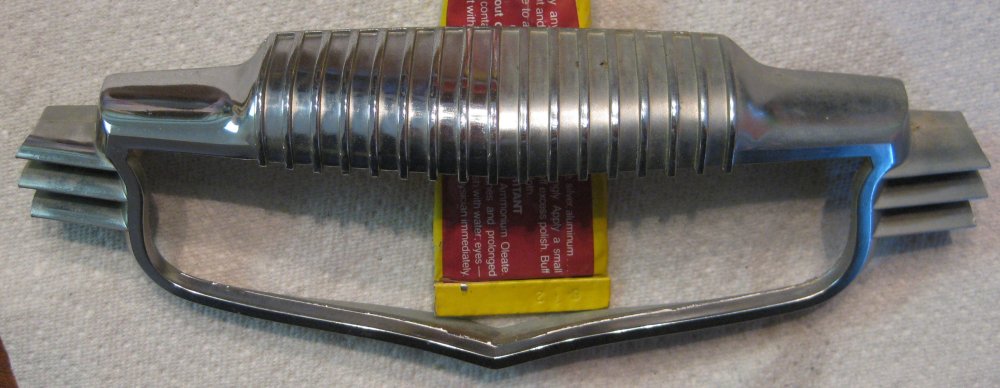
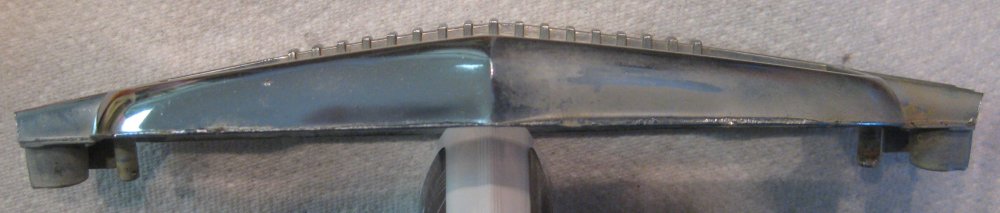
In parallel, I met up with a guy whose ebay auction I had won. Turns out, he was maybe 10 miles away, so rather than ship it, I offered to just meet him sort of in between. That worked out. This was for a relatively un-corroded trunk handle / emblem housing. Only had 1 of the plastic lenses, though the chrome is MUCH better than what was on the car.
Decided not to ask NAPA about the crush washers. If it's another transfer from Phoenix, this NAPA is farther from my house than at least 10 other auto parts stores. I went there because they listed the brake cylinders and hoses online. The closer stores probably could have looked them up and ordered them in as well. So I went to the O'Reilly's for the crush washer. The guy there was very helpful. Big fan of Buick's. He had a '57, and we both know the guy he sold it to. He told me about a '55-'57 Olds specialist about 8 miles away and gave me a heads-up on where to get a "flat nut" for one of the trim pieces. He had a late-model Buick Park Ave in the parking lot, and asked me to stop by with the '55. I think they'll see me again.
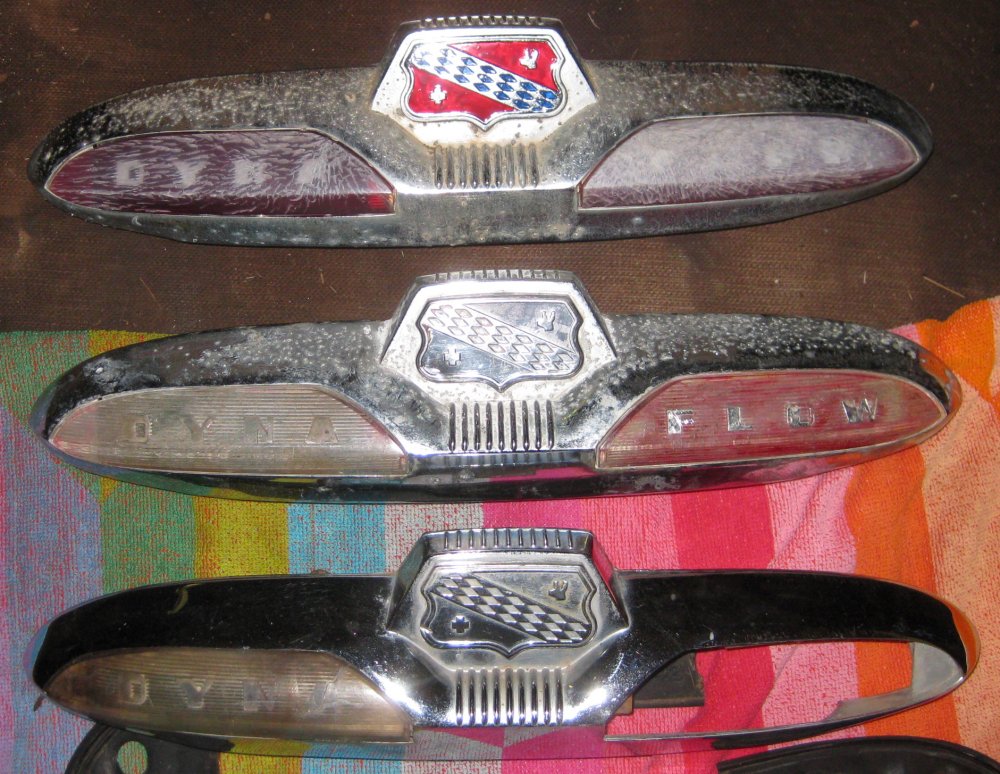
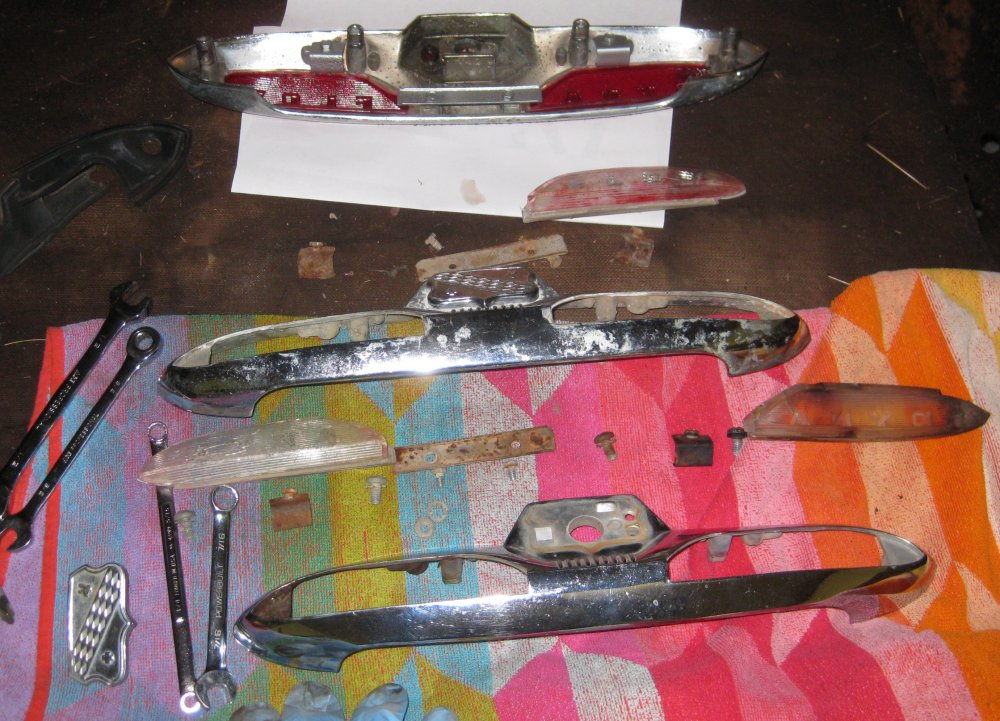
I went ahead and confessed my plan to swap around emblem parts and resell the leftovers to Carol so she wouldn't be all worked up to see this happen. If this works out, for not much money, I'll have a MUCH nicer trunk emblem. Got one in the mail today, the other with the meetup. Started disassembly. Got one emblem painted.
1/5/14 - trunk handle and emblems
Got a second emblem off and painted. Got the emblem off the original trunk handle - plan to keep this one as it's the least dinged-up of the three, with the nicely chromed housing, and the lenses from the third one. So there's some parts from each of them. Plan to clean up the others as much as possible, reassemble, and send them back out onto ebay...
1/9/14 - trunk handle and emblems
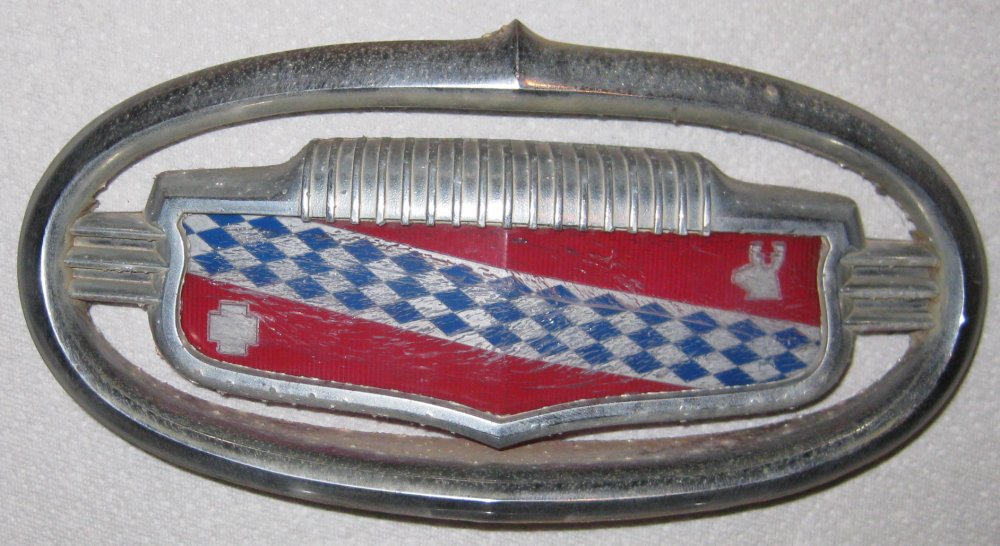
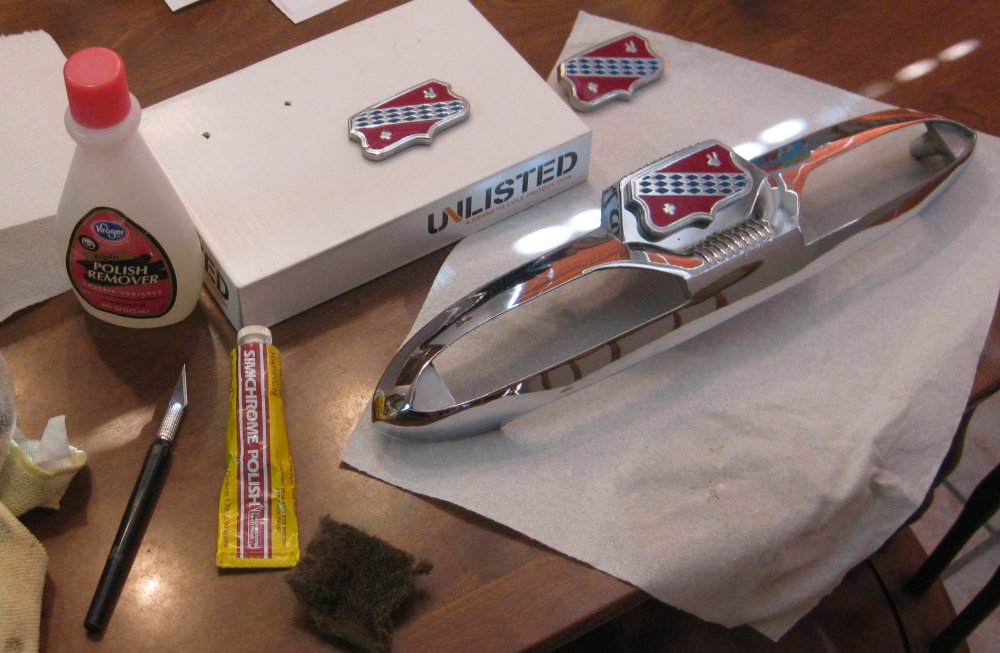
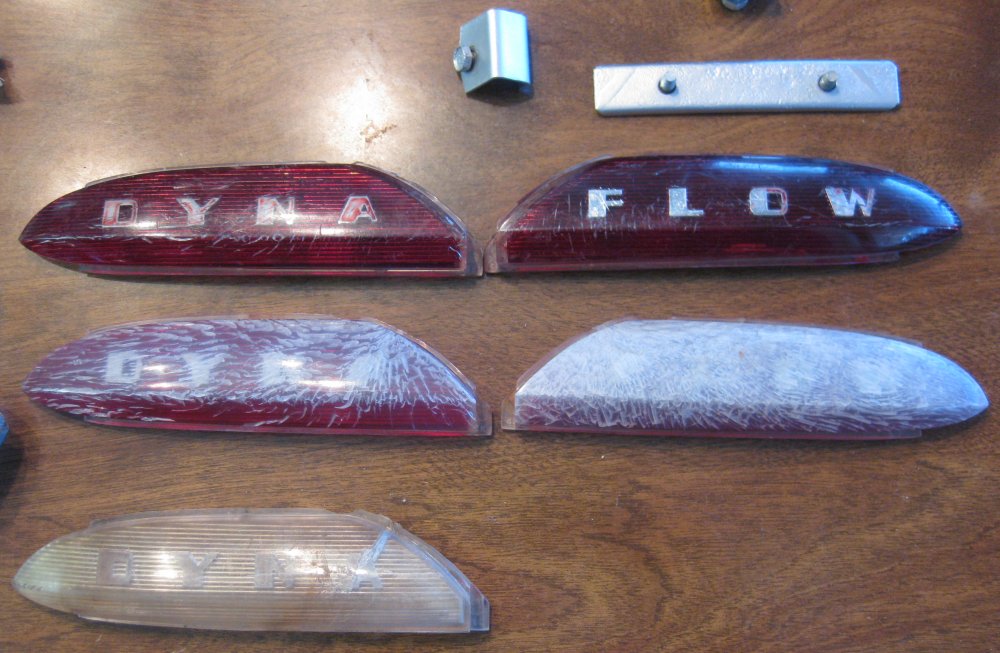
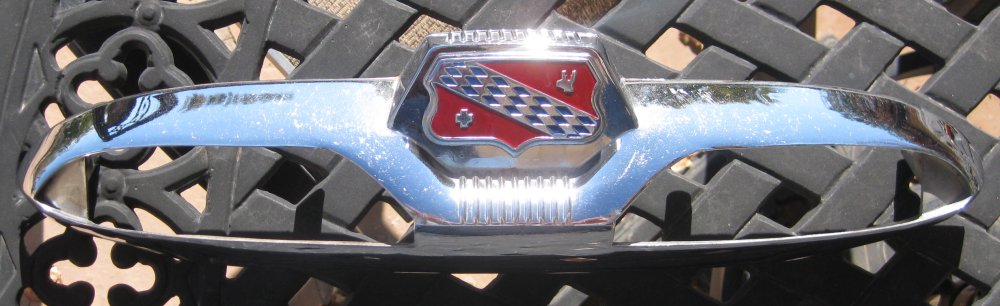
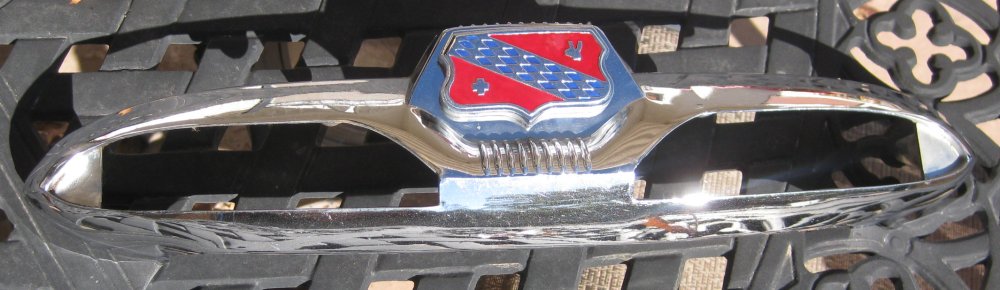
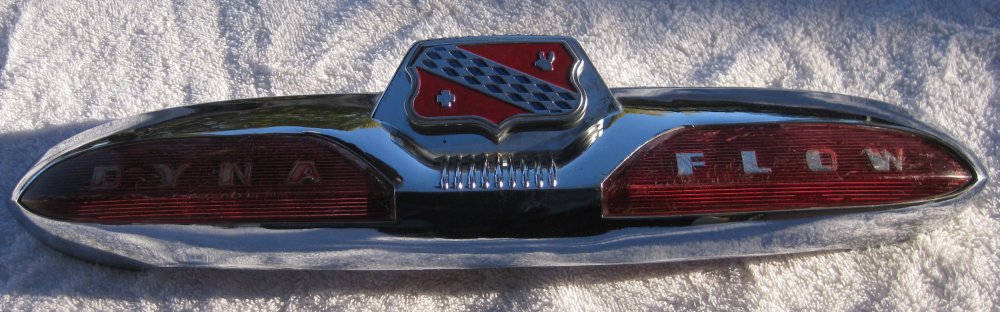
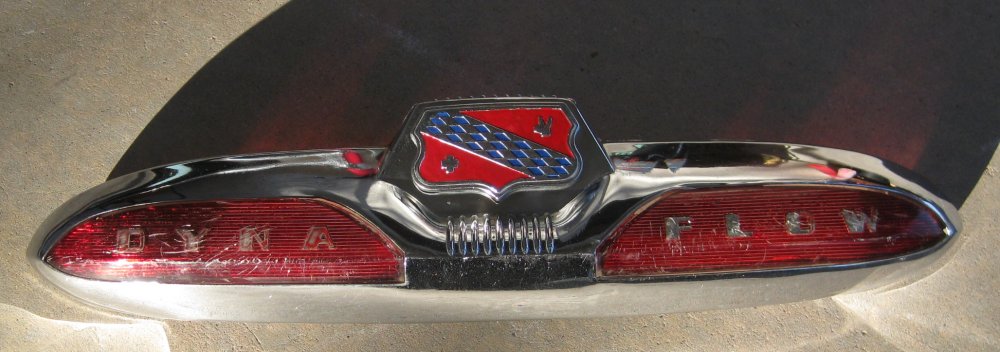
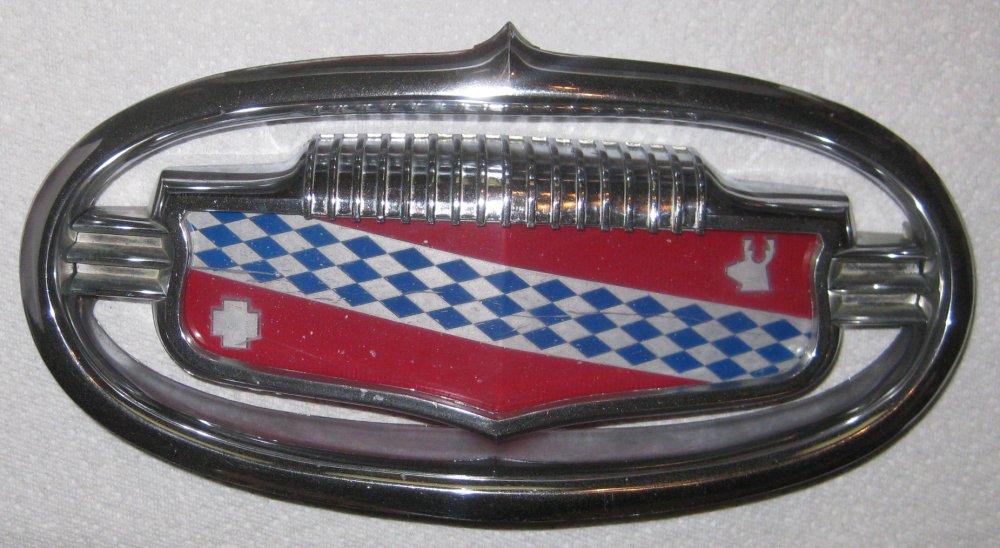
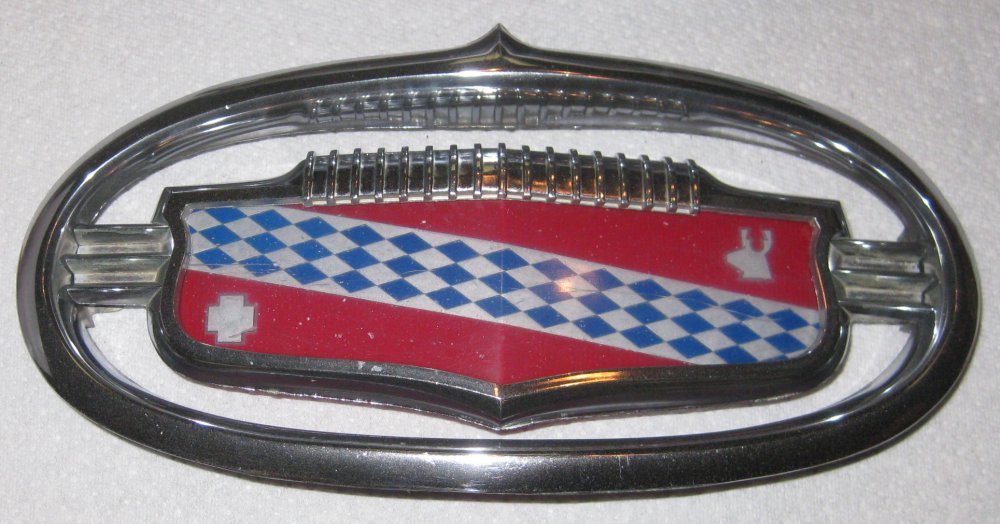
During the week, got all 3 crests painted. Cleaned up the best pair of lenses and repainted the lettering with silver. Polished the best of the chrome parts to clean up old paint overspray (blue paint all over the part, though it looked pretty good in the "before" photos).
1/10/14 - trunk emblems
It's an off day from work. Got lenses painted in red. Turns out the silver wasn't heavy enough, as the solvent in the red got through some of the silver. Still much better than the other lenses. Cleaned up and painted the screws and hold-down clips for the plastic lenses. Got all 3 sets of trunk emblems reassembled.

1/11/14 - trunk emblem and hood emblem
Got the keeper trunk handle/emblem back on the car. Got the first of the non-keepers listed on eBay. See how that goes. Hood emblem from Colorado arrived. Now I know what "Colorado Chrome" means - it's not pitted, but more like sandblasted. I could tell from the marketing photo (only one photo) that the plastic was cloudy. Turns out this was from the same sort of road dust etching effect that we get on modern molded-plastic headlights now, but multiply by 60 years instead of 5 or 10. So I got out the headlight clean-up kit (Mequiar's Plastix) and rubbed out the front of the plastic part. It shined up pretty good. I washed it and scraped clean the slight amount of hardened-on dirt with the point of a knife, then started painting. Also over the course of the day polished the chrome parts. Though the emblem on my car might shine up better, it's got much more pitting.
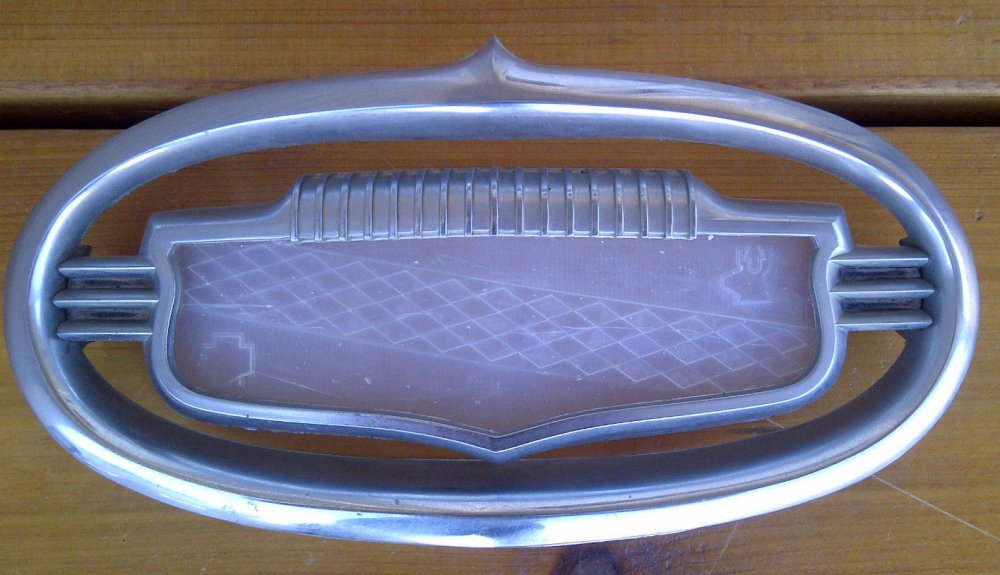
1/12/14 - At first I thought I would keep the hood emblem plastic that was on the car, but this eBay special turned out so good with the plastic shined up that I'm keeping that one. Will see how the eBay auction goes to "sell back" the extra trunk emblems, then maybe list the hood one. Or maybe decide that's a cool thing to just hang on the wall...
1/12 - 1/17 - week of not feeling so great, plus going to work, so didn't do anything with the car. Did take the '55 to the cruise night on Thursday night. This week they had quarter midgets and kid-size drag cars for the kids to sit in. They were promoting a "kid drive" day at the dirt track...